 Product Personaliser
Steps
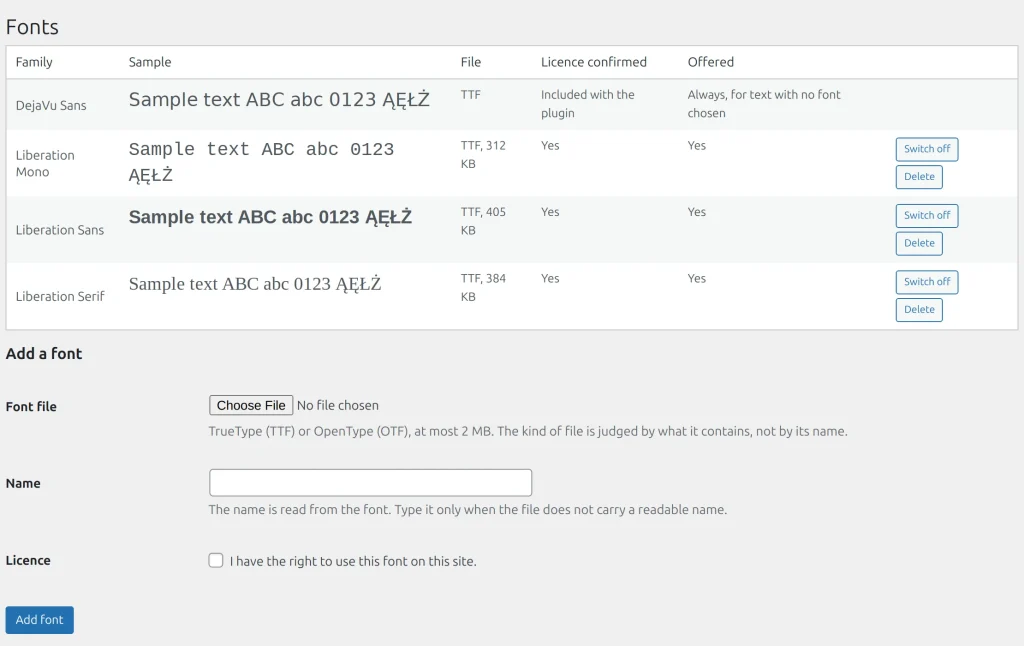
- Open Personaliser > Fonts.
- Under Add a font choose the Font file (TrueType or OpenType, up to 2 MB), type a Name and tick I have the right to use this font on this site. Press Add font. WOFF2 files are refused.
- On a canvas product press Fonts under Add to this product. Tick the fonts the customer may choose. Select all and Clear selection act on the fonts in view, a message says for example "5 of 12 fonts selected", and a search field appears above 12 fonts.
- Press Update.
A product with no font ticked offers the standard font only. The built-in font, DejaVu Sans, is always available for text with no font chosen and cannot be deleted. You may keep up to 100 fonts. A font used by a product or template cannot be deleted; switching a font off makes designs that name it fail the next check. Fonts are part of the canvas editor, so the section appears only while the editor is Free canvas.
Example
A sign maker uploads three fonts, ticks two of them on the "Name plate" product and leaves the third for another product. The buyer sees exactly two fonts in the Font list.
Related topics
Was this page helpful?
Report an errorApplies to version 0.1.0.