 Product Personaliser
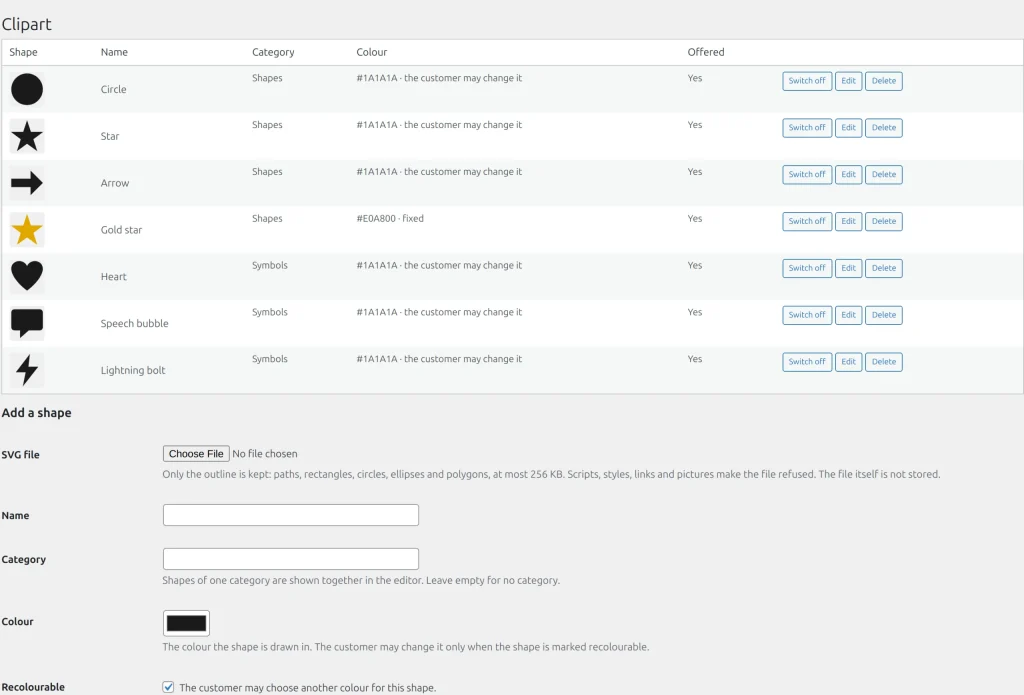
Seven shapes are installed with the paid build. Customers add one with Add clipart in the canvas editor and may change its colour when you allow it.
Steps
- Open Personaliser > Clipart. The table lists Shape, Name, Category, Colour, Offered and the actions Switch off, Edit and Delete.
- Under Add a shape choose an SVG file (up to 256 KB). It is reduced to plain path data; files with scripts or other unaccepted elements are refused.
- Set Name, Category, Colour and Position in lists.
- Tick The customer may choose another colour for this shape if wanted. Without it the colour is fixed.
- Press Add shape.
Switch off stops offering a shape without deleting it, but designs that name it fail the next check. A shape named by a template cannot be deleted. A clipart that keeps its own colour counts that colour in a print type's most-colours limit.
Example
A bakery uploads a drawing of a whisk, sets the category "Kitchen" and allows recolouring. Customers put the whisk on an apron in any colour.
Related topics
Was this page helpful?
Report an errorApplies to version 0.1.0.