 Product Personaliser
Personaliser adds an editor to the product pages of a WooCommerce shop. The customer's design is checked by the shop, priced by the shop and kept on the order. This page takes you from installation to a first personalised product.
Steps
- Install and activate WooCommerce (8.8 or newer).
- Upload the Personaliser folder to
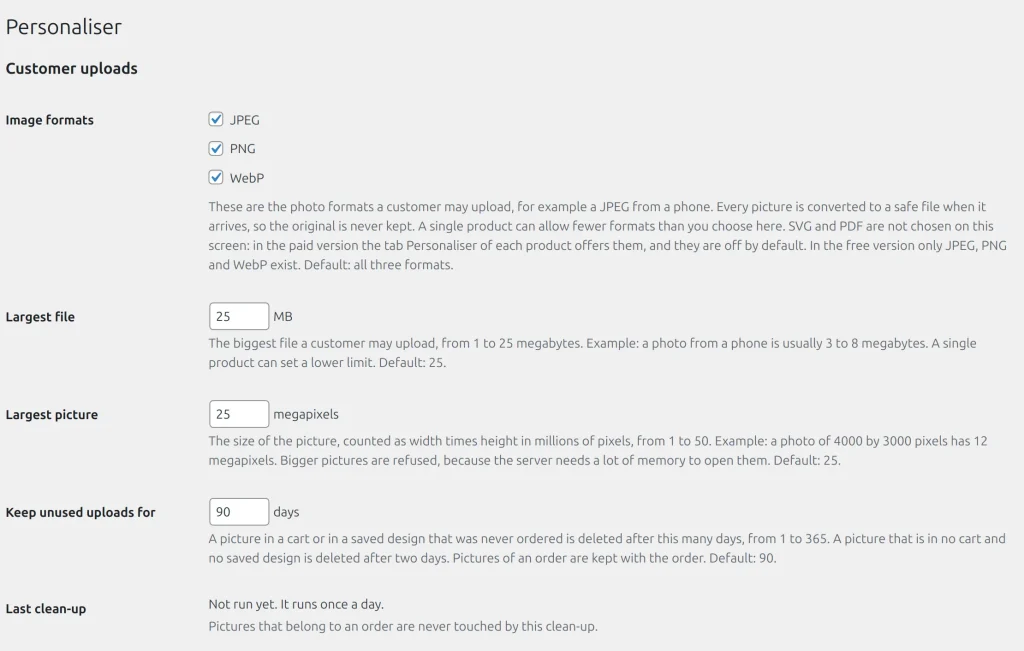
wp-content/plugins, or install it from the Plugins screen, and activate it. - Open Personaliser in the admin menu. The first entry is Settings: set the largest file, the largest picture and how long unused uploads are kept, then press Save settings.
- Open Colours and add the colours your products come in (optional).
- Edit a product, open the Personaliser tab in the Product data box and tick Customers can personalise this product.
- Add the product photo, draw the print area on it and add at least one field. Press Update.
- Open the product page and try the editor.
What you get
The free build gives you the form editor, one view with one print area, the colour list, surcharges, the live price, the design on the order and import and export. The paid build adds the rest; see the comparison.
The plugin asks once whether you want to connect to the licensing and update service. You can press Skip: nothing is sent and the plugin works fully.
Example
A shop owner who sells pens installs the plugin, adds one text field called "Engraving" limited to 20 characters, and the pen page shows a field and a frame on the photo within minutes.
Related topics
Was this page helpful?
Report an errorApplies to version 0.1.0.