 Product Personaliser
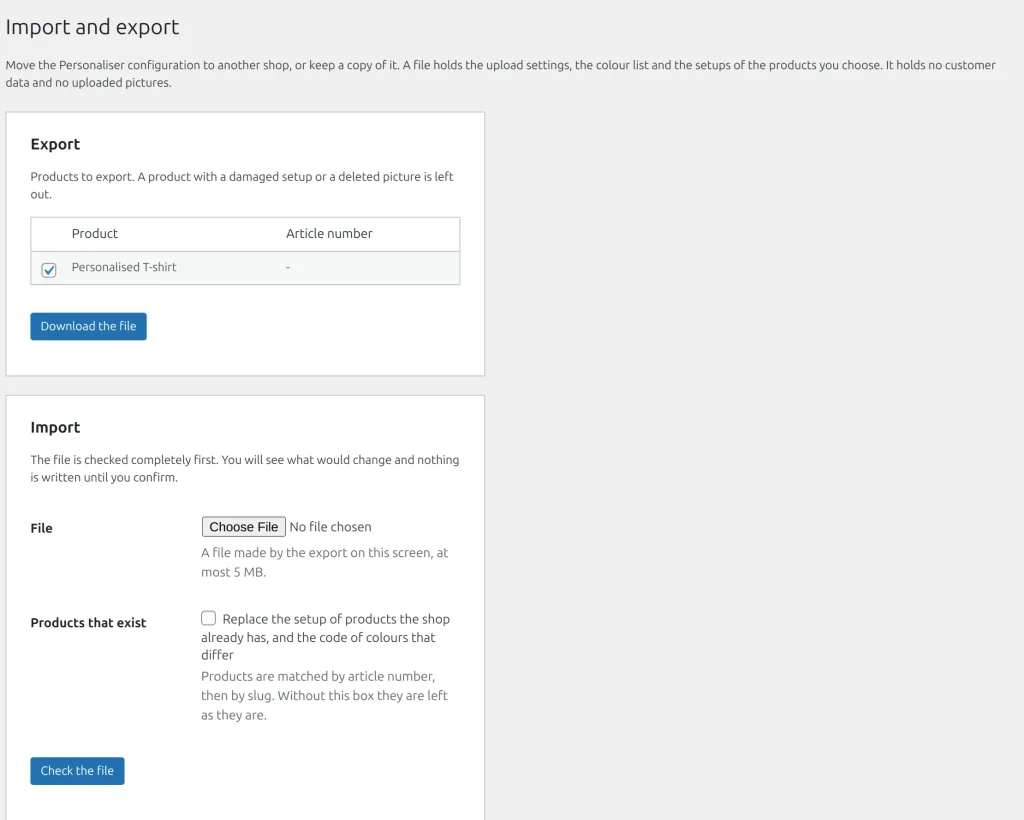
Export
- Open Personaliser > Import / export.
- Tick the products in the table.
- Press Download the file.
The file holds the upload settings, the colour list (colours with a code) and the setups of the chosen products with the file names and checksums of their pictures. It holds no customer data and no uploaded pictures. The paid catalogue, rules and discounts are not exported.
Import
- Choose the File (up to 5 MB, 500 products, 1000 colours) and press Check the file.
- Read the preview: what will be added, what will be changed, what is skipped and why.
- Press Confirm and import. Nothing is written before.
New products are created as drafts. Their pictures must already be in the media library; products with missing pictures are skipped. Tick Products that exist to replace the setup of products that already exist (matched by article number, then slug).
Example
An agency prepares ten products on its own shop, exports them, imports the file on the client's shop, checks the preview and sees ten drafts ready to be opened and published.
Related topics
Was this page helpful?
Report an errorApplies to version 0.1.0.