 Product Personaliser
Every personalised product uses one of two editors.
Form
The customer fills the fields you set up and sees the text and pictures in each field's frame on the product photo. Nothing can be moved or turned. Choose it when the position must never change, for example one line of engraving on a pen. The form is in the free build.
Free canvas
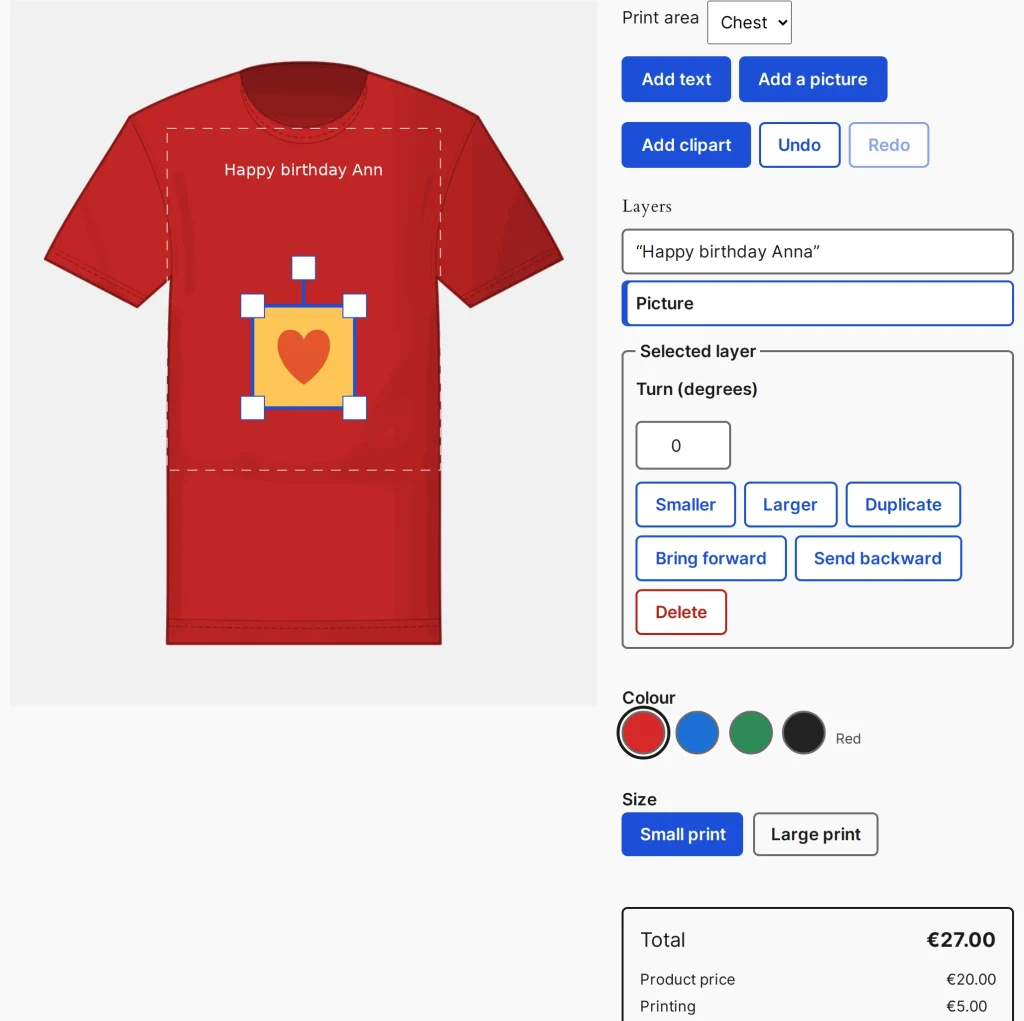
The customer places text, pictures and clipart anywhere on the print area. This mode is in the paid build.
- Add text, Add a picture, Add clipart, Undo and Redo (50 steps).
- A Layers list, top layer first. Selecting a row opens Selected layer: text, size, colour, alignment, Curve the text along an arc, turn, font, and the buttons Smaller, Larger, Duplicate, Bring forward, Send backward and Delete.
- Text up to 500 characters and 10 lines per layer. Free layers add no surcharge of their own.
- Choice and quantity fields stay in a form beside the picture.
- Two-finger pinch works on a touch screen.
- Limits you set per print area: smallest and largest text in points (6 and 200 by default) and smallest and largest picture as a percentage of the area.
A new product starts as Free canvas when the paid build runs, otherwise as Form. The server checks every design against the setup; the browser is never trusted.
Steps
- Edit the product, open the Personaliser tab.
- Under Editor choose Form or Free canvas.
- Set the canvas limits in the print area, then press Update.
Example
A buyer personalises a mug: a name in a chosen font, turned a little, the date in a smaller line below, and an uploaded photo made larger. Each text and picture is its own object; they can overlap. A click on a row of the layers list selects it for changes.
Related topics
Was this page helpful?
Report an errorApplies to version 0.1.0.